
Earlier this week I confessed some rookie mistakes I made at the NTKBF Tournament at Purtis Creek. One of the things I vowed to fix was my Hawg Trough measuring device. It was hard to keep the fish on it, hard to measure and hard for the judges to judge a proper length. I was using it as it came and in most cases this would work fine but for tournaments, I needed to do some modifications. My friend Bryan, a seasoned angler and kayaker, showed me his mods and I was blown away. So simple but so useful. Bryan was kind enough to send me some pictures and give me permission to, in essence, copy his design. I changed the mods slightly but this is very much inspired by Bryan's design. Without further delay I present the New and Improved Hawg Trough.
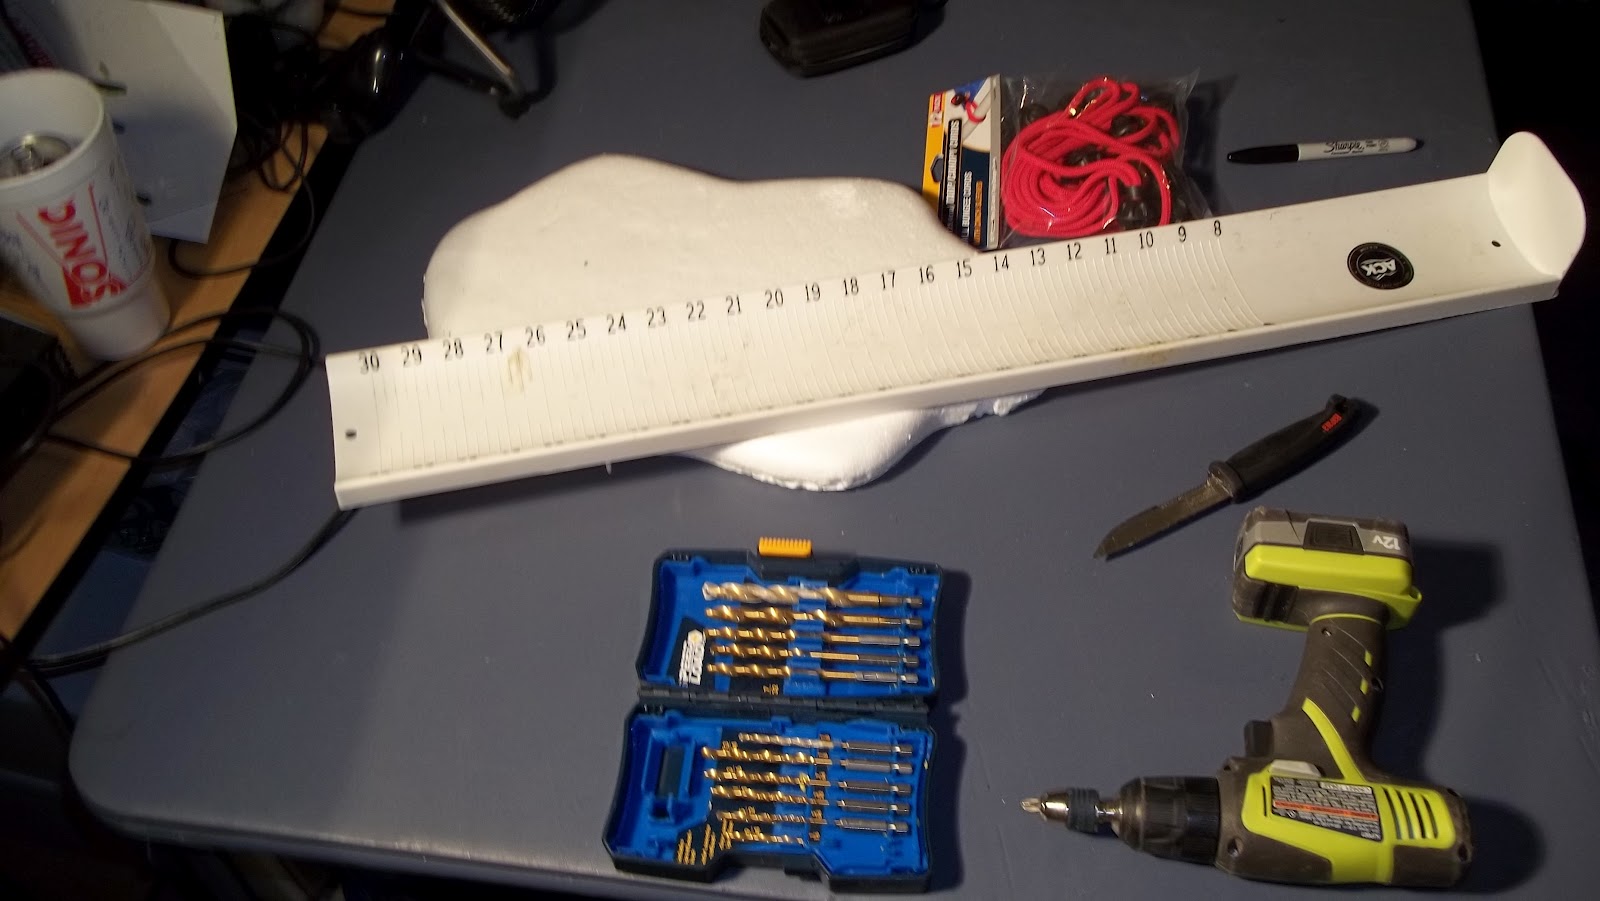
For this project you will need a Hawg Trough. These can be purchased many places in different colors. I got mine at Austin Canoe and Kayak with a Texas Kayak Fisherman discount for about $15. You will also need some bungees with ball ends. I got these at WalMart in the camping section. 6 bungees for $3. You'll need a Sharpie, a knife, a drill with a drill bit, some packing or duct tape and some type of styrofoam or pool noodle (for floatation).

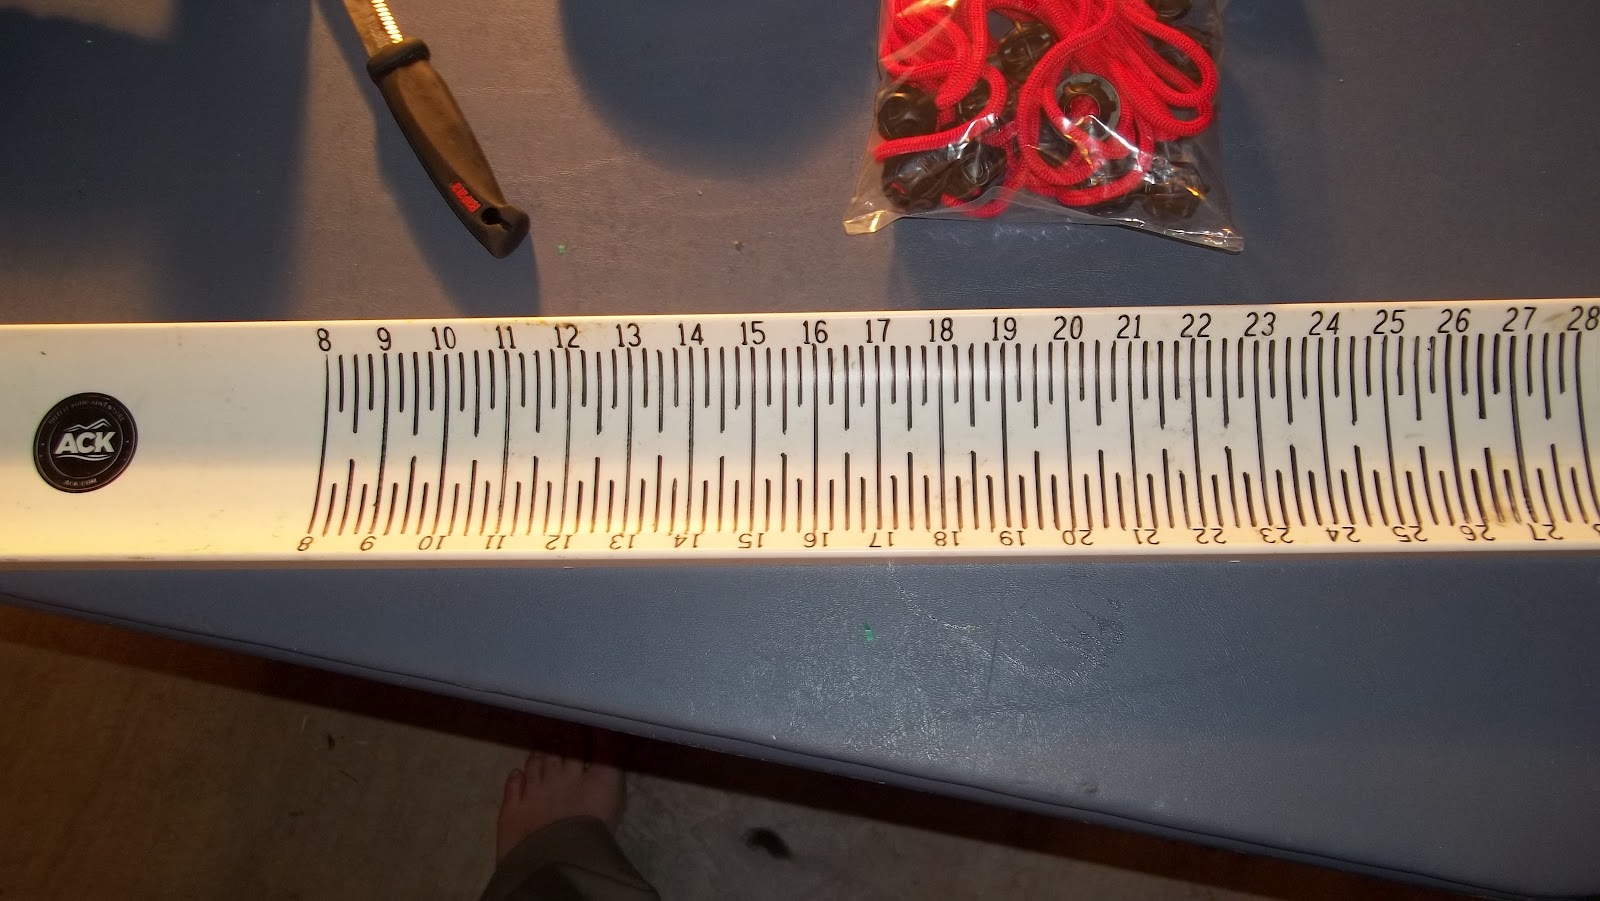
The first step is actually the most tedious. If you notice in the above image, only the numbers are marked. Each Hawg Trough has ridges to mark each quarter inch but as you can tell, seeing them in pictures is difficult. Let's help the judges out and run the Sharpie down each ridge to mark the quarter inches and allow the judges to see a more accurate measurement. See how much clearer this is?!

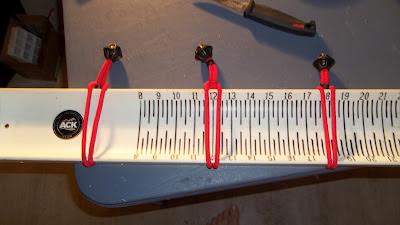
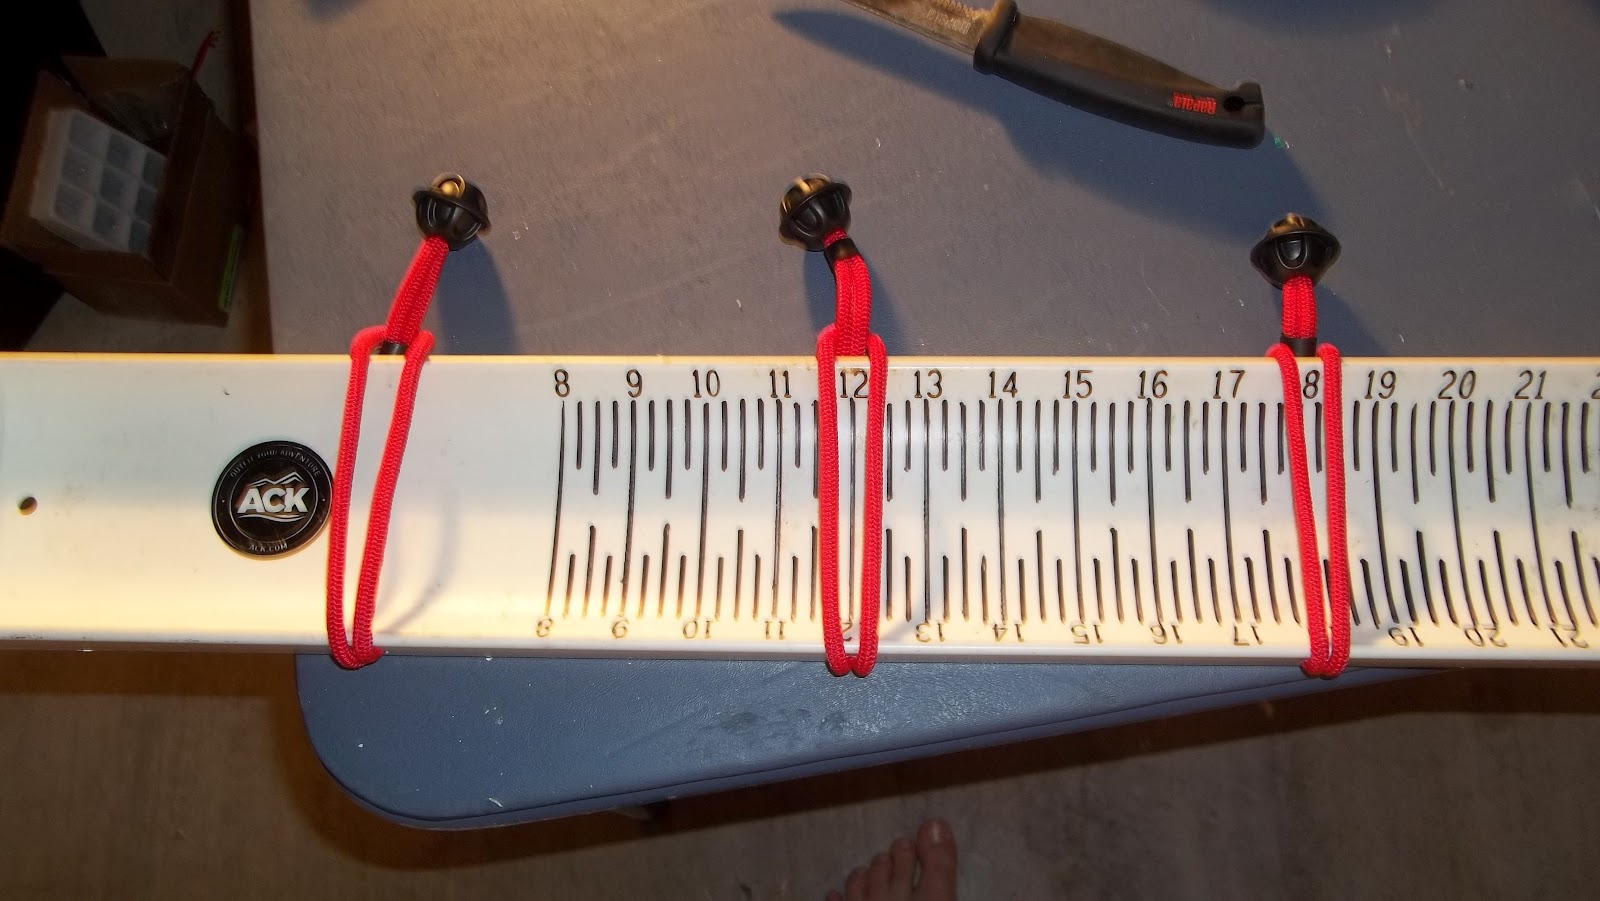
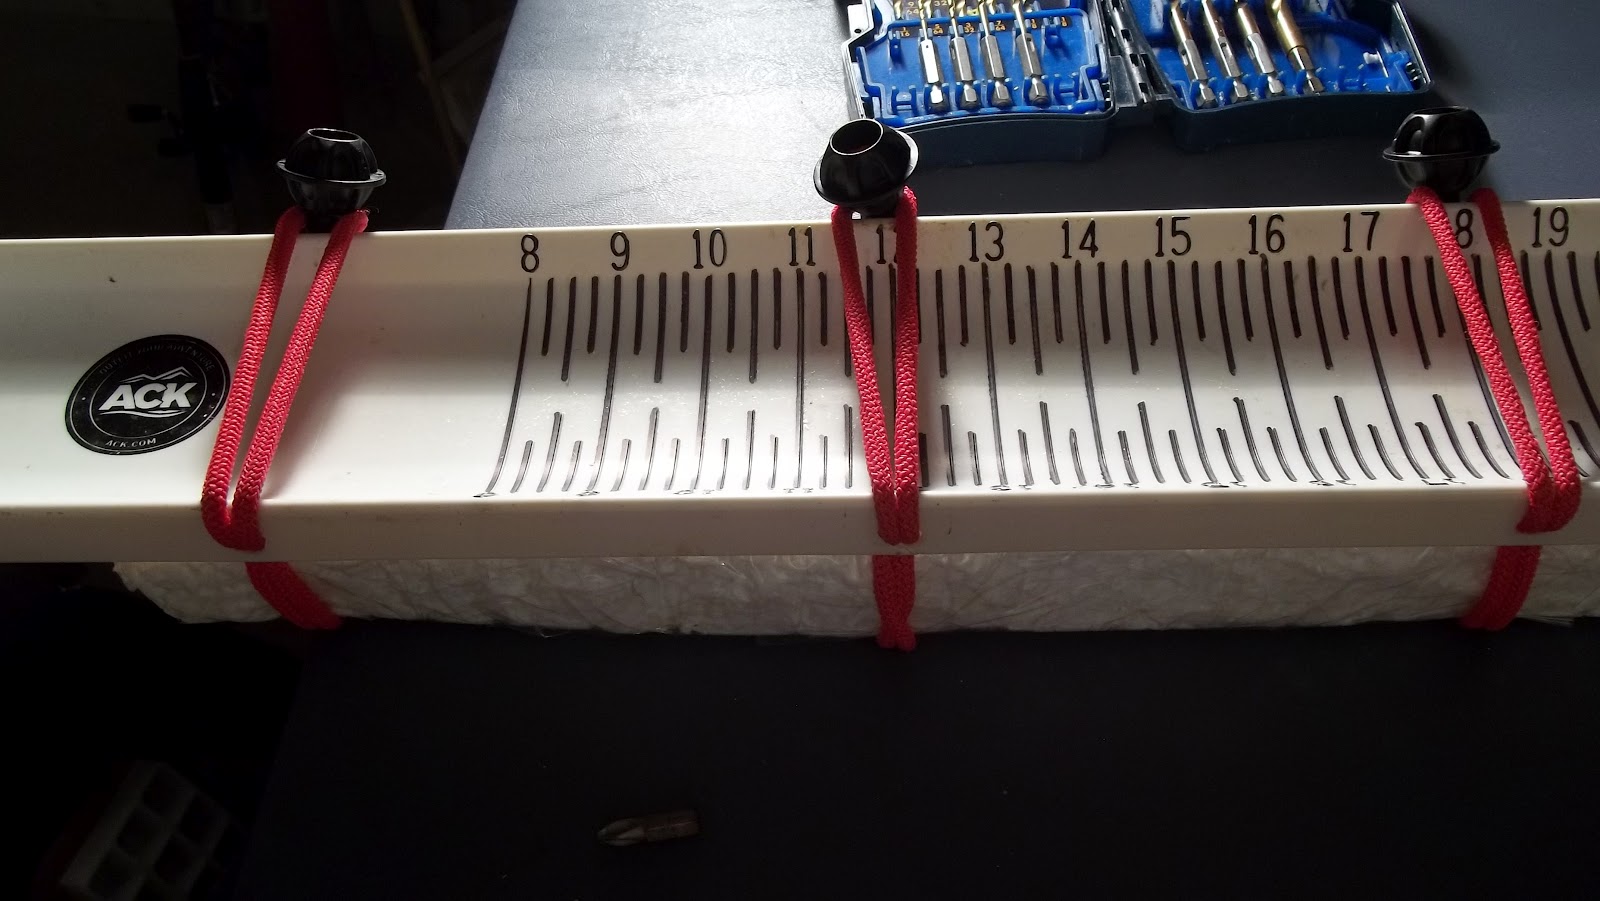
Next we need to lay out the bungees where they are going to go and mark the spots we need to drill. You will have to drill on both sides (a total of six holes). On most of these troughs there is a double ridge that runs along each side. You only want to drill through the outer most ridge, not both. You hole size should be just enough to get the bungee through tightly. This smaller hole and single ridge will provide a friction point to keep the bungees in place.


For this project you will need a Hawg Trough. These can be purchased many places in different colors. I got mine at Austin Canoe and Kayak with a Texas Kayak Fisherman discount for about $15. You will also need some bungees with ball ends. I got these at WalMart in the camping section. 6 bungees for $3. You'll need a Sharpie, a knife, a drill with a drill bit, some packing or duct tape and some type of styrofoam or pool noodle (for floatation).
Next we need to lay out the bungees where they are going to go and mark the spots we need to drill. You will have to drill on both sides (a total of six holes). On most of these troughs there is a double ridge that runs along each side. You only want to drill through the outer most ridge, not both. You hole size should be just enough to get the bungee through tightly. This smaller hole and single ridge will provide a friction point to keep the bungees in place.

After you drill the holes, thread the bungees through. It should look something like this. Your selection of hole placement is preference really but I am planning on catching some fish over 20 inches so I put the last bungee at 18 inches.
Next you'll need to cut a piece of styrofoam or pool noodle to float the board. I used styrofoam and chose to wrap it in tape so it wouldn't shed all over my kayak. This is less necessary with a pool noodle.
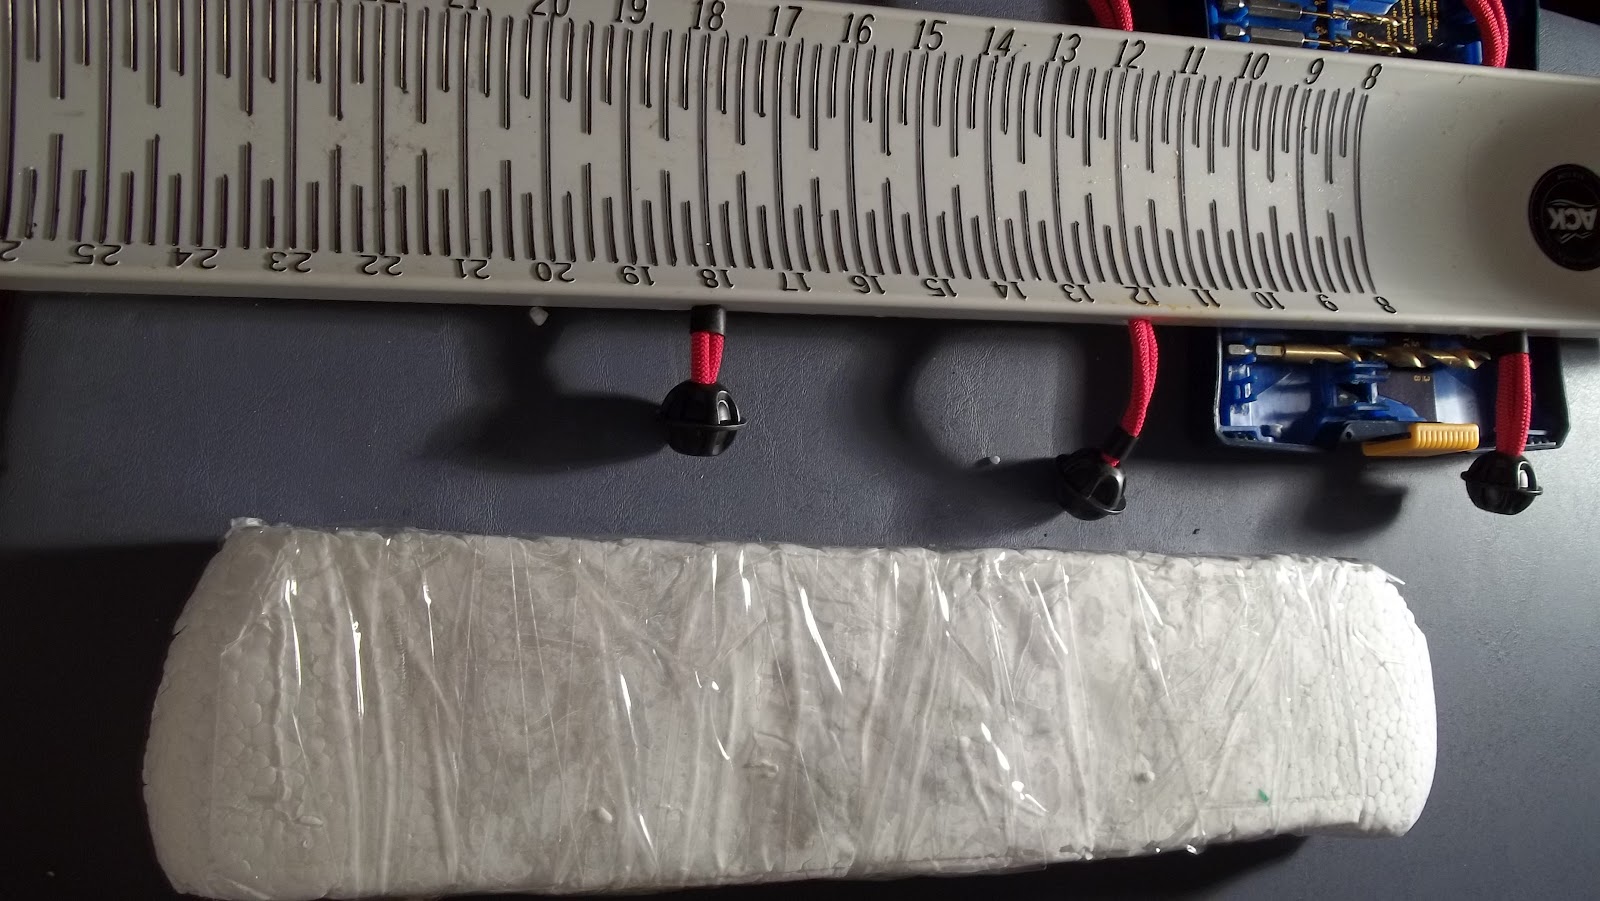
It is pretty easy at this point. Slide your float between the bungees and trough and voila! You can vary the thickness on the float but I wanted it to float and sit up off of my lap a bit.
Hopefully this will help a few folks avoid some of the foibles of kayak tourney fishing that I committed last week. This rig should float, keep fish attached to the board better and keep those judges from having to guess at your lengths.
If you like the idea, please share it with others. Thanks Bryan Row. This will be a huge help next time for me!
No comments:
Post a Comment