This winter I was able to acquire a kayak I've been eyeing for over a year: The Wildy Commander 140. I first demoed one last year at Fly Fish Texas in Athens, TX and had been thinking about it since that time. I've had several trips out on the water now and it is time to report in.
The Rigging
My Commander, nicknamed "Winter Soldier" by my son, is the 14 foot version with a front bow skirt and a rudder system. I've added a Lowrance Elite 5 fish finder, a Super Nova Fishing Lights LED light kit, several RAM and YakAttack accessories, a Bullwinkle mount, an anchor trolley and switches for the electronics. I move it from place to place with a C-Tug cart and transport it either via trailer or in the bed of my truck with a bed extender. It is the camo color offered by Wilderness Systems.
The Good
The Commander 140 is the second easiest kayak to stand on I've ever tried, just short of the Hobie Pro Angler (but let's be honest, that thing is a barge, like standing on a cruise ship). Because the Commander is a sit in/sit on hybrid, the point of balance for your body when standing is not your ankles, it is actually your knees because of the padded side rails. Imagine trying to extend your arm perpendicular to your body while standing. Now, in that extended arm, with just your fingertips hold out a six foot long broom handle with a tennis ball on the end from the opposite side. Now try it again, two feet closer to the ball with your whole hand. The second way is easier. Much easier. This is the same thing with the Commander. Using a support point closer to your head eliminates sway in your torso and allows you to balance better.

Standing isn't the only nice thing though. The kayak is spacious. I can store my BlackPak and C-Tug in the back without a problem. There is even enough space that I usually bring a bag of snacks and drinks to stow back there as well. In the main area, the seating options also shine. The lumbar support offered from the Wildy seat is good with adjustable leg straps, back rest straps and tensioners to keep the seat in place. If you need to get a little higher up just fold the seat back down and slide it under the Captain's Perch. The Perch is molded like a seat and getting up and down changes your angle and can also relieve stiffness after long hours on the water. If the Captain's Perch still isn't high enough up, just stand up and paddle.
In front of the main area is a cross bar for mounting items or carrying or resting items. This separates another front area that when you add the bow skirt with the mesh pocket can become additional storage that is not on the floor of the kayak.
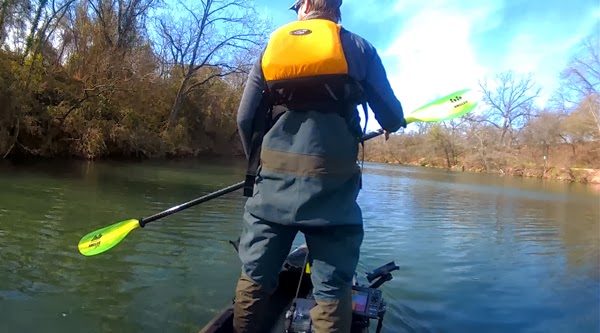
As for tracking, the Commander 140 stays pretty straight when paddling and doesn't deviate course. For long paddles with wind, this helps your paddle stroke be more efficient.
So it is pretty easy to stand in, tracks well, has good seating options and ample storage space. There is one more thing that shines about this kayak: The Weight. Listed at only 68 pounds, this 14 foot kayak can be carried on your shoulder and has padding provided to do so. Going from Point A to Point B is easier than with most.
The Needs Improvement
As with most hybrid sit in/sit on kayaks, there are no scupper holes. You need to keep a sponge or pump handy if you are fishing in heavy chop or rain. With a bow skirt you'll eliminate most of the water that could potentially get in on normal paddling days. I also don't recommend this kayak for anything surf side but bay side adventures will be a great fit.
Another thing that is difficult is inside the side track you have these bungee connectors that can move back and forth to be tightened. The tightening happens with a hex key. The hex key is a size that isn't included in a normal $10 set at the hardware store so hang on to the key. I don't have mine and it's been a bear trying to find a size to match it. If Wildy could make a place, possibly under the Perch that had a couple of clips and a couple of the hex keys it would help. At least for me.
Bow and stern skirts currently need to be purchased separately but in the future it would be cool to see a retractable skirt integrated into the front and rear hatches. If you need it you extend it and if you don't it rolls back into its self on the hull. Think of it like those retractable window shades for cars.
It could also be a nice addition to include rod tubes for the main area. I currently store rods in my BlackPak and two on a Bullwinkle mount up front. Rod tubes would store a few of the rods out of the way of limbs etc and also not have them in the way of a sweeping hookset.
The final thing is maneuverability. Because the Commander 140 tracks so well and is long, it needs some extra effort to turn. It takes some extra strokes (as does any 14 foot kayak) to turn but the added rudder can greatly ease that burden. I don't see this as much of an area of needed improvement as a "just be aware of it" item if you don't get a rudder.
Final Thoughts
If you are in the market for a kayak you can stand in, camp in, store tons of gear in, and just all around enjoy, this is a kayak you should look at. With 450-475 pounds of capacity it will accommodate most paddlers and sometimes an additional guest. The Commander is stable and can make a long day of paddling seem short. I'd highly recommend a demo of one.