Showing posts with label Austin Canoe and Kayak. Show all posts

Cooler Weather Means Camping in Texas

Let's face it. Summer in Texas is hot. And when I say hot, I'm not talking sweat a little bit hot. I'm talking about the hydrate or get kidney failure hot. But with October winding down, Fall is here and bringing with it beautiful weekends to get out and enjoy nature. Whether you have a large family or it's just you and a couple of friends, camping is one of the best ways to soak in the beauty that nature is wrapping us in.

Camping mixed with some fishing and kayaking is my preferred envelopment in the season. While I would love to be down at the Devils River right now, a weekend escape to a local lake can be just as fun (and a whole lot easier to do with the kids).

Some people (me included) worry about camping with kids. It's easy for adults to go and enjoy the outdoors but ankle biters add a different twist. Here are a few things to keep in mind that have caught many a parent unprepared.

Kids are curious. They may be a bit overstimulated the first time to a new spot. Plan flexible segments of time where they can explore their new surroundings with you. They often will want to look at animal tracks, interesting sticks, cool rocks, every piece of scat on the trail and the list can go on forever.

Kids have patience at times and at other times don't. You need to understand from the get go that your time frame and theirs may be considerably different. It may also change as their mood does. A three night camping adventure could very likely only last a couple of hours. It is as variable as the Texas weather and you should plan for that. It's ok to leave early. Don't set yourself up for disappointment. Plan for the worst and hope for the best. If you power through and "force" the kids to stay for your planned duration, it may be the last time they ever go camping with you.

Kids love activities and snacks. This is a simpler one to navigate. Have some things to do while you are at your campsite. Kayaking is a favorite of my kids. They love being on the water, paddling around and looking at things. They also like to walk trails and look for things. Things is not specific here for a reason. Sometimes it's leaves; sometimes it's footprints. It depends and we leave it up to the kids. Snacks are the other key ingredient. Having smores is great around a camp fire. Having trail mix or juice that they can have while on a hike or paddle is also a good way to keep interest up. Look at 4 year olds playing soccer. For most of them, they play to get the snack at the end. Camping is no different. What develops is an association of a good time around camping or kayaking or hiking because there is not a distraction of "when can we eat?". When it is readily available they can focus on nature.

Pack for all weather. You will want to pack for cold and hot when you go. Little kids especially have a harder time with temperature shifts than we adults do. Have clothes, sleeping bags, jackets and shoes for all weather. Also don't forget a few changes of clothes if you are going to be out for more than a few hours. (And even then it is a good idea).

Hopefully as Fall joins us over these next few weeks, you will be able to enjoy the great outdoors in a tent, a kayak or on a trail with those you love.

Helping people to get motivated to get out there is Austin Canoe and Kayak. They are giving away some sweet outdoor gear now. For your chance to win check it out below. Even if you don't win, ACK is a great place to stock up on all your outdoor needs.



The Five Kayak Fishing Gadgets I Want (But Don't Have Yet)

Let's be honest. There will always be a new gadget, toy, accessory or tool that, regardless of your hobby, you will want. In kayak fishing it seems almost weekly some new item enters the market to improve the on the water experience. I spend plenty of time scouring the web for the newest, coolest item that will change my fishing time in the yak for the better. Some of these are fairly inexpensive; some not so much. Some of you may have some of these. A few of you may have all of them. To those few, I am jealous. It was hard to do but I have boiled down the catalogs and websites to the five items I don't have yet but would love to try.

Revolution Rod Holder

5. Ram Rod Revolution Rod Holder 


Being able to pivot and tilt any direction is valuable when you only want to mount a couple of rod holders, if that many. Coming in at just under $32 the Revolution Rod Holder is a great buy and a great tool. The dual pivot points allow 360 degree turning on the bottom axis and almost 360 on the top axis. This is definitely going on the Christmas list.


4. Feel Free Camel Kayak Trolley

Feel Free Camel Kayak Trolley

The Feel Free Camel trolley is truly a personal beast of burden to get your kayak, plus all that gear, in and out of the water without making you feel like you have already paddled 10 km. The Camel is designed not to tip over when loading. Simply let it kneel to load your kayak aboard, then tighten up the tie strap which automatically locks the trolley to the shape of your hull and off you go. The Camel Trolley adjusts to most kayak beam and length dimensions and can be stowed easily using its unique folding mechanism and quick release wheels.
-from ack.com

At $129 this one comes in a little more expensive but well within the range of other trolleys. 


3. Yeti Tundra 50 Cooler

Yeti 50
The construction of Yeti Tundra Coolers is carried to the extreme, because there are elite groups of outdoorsmen and adventurers who seek extremes. Desert sun has scorched these coolers. Blizzards have frozen them. Bears have gnawed on them. They have tumbled off trucks and cliffs. All the while, Tundra coolers have kept their cool. This is one ice chest that puts no conditions on reliability under the harshest conditions. There's no better choice to keep food and drinks cold in a campsite, job site, pickup bed, or over your favorite fishing hole. One piece roto-molded UV polyethylene construction is extremely durable and a full length, self-stopping hinge can't hyper extend and break. You'll never buy another cooler! Replaceable nylon rope and textured grip handles make carrying easier. Padlock holes are molded into the cooler body and lid for added security. Dry goods rack included.- from ack.com

The most expensive item on the list, the Yeti 50 lists at $329.


2. YakAttack PanFish Camera Mount


YakAttack PanFish
Getting your camera pointed in the right direction just got easier with the YakAttack PanFish Camera Pole for Scotty Mount Systems. The PanFish features a split mast design with adjustable friction disks that allow quick and easy horizontal panning. Just grab the foam grip above center mast and rotate. Nothing to loosen, nothing to get loose. Just point and let go. The PanFish was designed for over-the-shoulder video with lightweight cameras. Maximum payload is recommended at 1 lb, including camera and housing. Mighty Mount and Scotty Mount versions available.- from ack.com

At $60, this is one accessory that can be added and utilized with existing hardware that doesn't break the bank. 


1. The Ram Aqua Box Pro 10


Ram Aqua Box 10
The RAM AQUA BOX™ product line has been keeping mobile phones and devices safe for years. Now, with the introduction of the AQUA BOX™ Pro, you have access to side buttons and full use of the touchscreen. Weather resistant and splash proof, this unique patented design allows access to all side buttons on the phone while in the case. Are you one of those people that can be a little rough on things? Our PVC Vinyl screen is replaceable so if you start to lose that crystal clear appearance, we’ve got you covered…literally. Allowing easy operation of the touch screen while in the case, the compact and sleek design means traveling with your AQUA BOX™ Pro is never a hassle. Think an enclosure will slow you down? Think again. Send text messages, listen to music, take photos or capture video, make calls all while protecting your phone. Includes a standard belt clip and safety lanyard, the AQUA BOX™ Pro series is perfect to carry along on your next adventure. -from rammount.com

When you have fishing apps, contacts and honey holes marked on your phone, the last thing you need is an oops moment. The Ram Aqua Box will prevent that, keep the phone safe and usable and hard mounted to your boat. It's a good day when all of it comes together. For $54 you can make it come together sooner!


If any of you have some of these gadgets I would love to hear from you. Let me know what you think on these and other things I might not have seen yet. 

A Tourney Ready Hawg Trough

Earlier this week I confessed some rookie mistakes I made at the NTKBF Tournament at Purtis Creek. One of the things I vowed to fix was my Hawg Trough measuring device. It was hard to keep the fish on it, hard to measure and hard for the judges to judge a proper length. I was using it as it came and in most cases this would work fine but for tournaments, I needed to do some modifications. My friend Bryan, a seasoned angler and kayaker, showed me his mods and I was blown away. So simple but so useful. Bryan was kind enough to send me some pictures and give me permission to, in essence, copy his design. I changed the mods slightly but this is very much inspired by Bryan's design. Without further delay I present the New and Improved Hawg Trough.

For this project you will need a Hawg Trough. These can be purchased many places in different colors. I got mine at Austin Canoe and Kayak with a Texas Kayak Fisherman discount for about $15. You will also need some bungees with ball ends. I got these at WalMart in the camping section. 6 bungees for $3. You'll need a Sharpie, a knife, a drill with a drill bit, some packing or duct tape and some type of styrofoam or pool noodle (for floatation).


The first step is actually the most tedious. If you notice in the above image, only the numbers are marked. Each Hawg Trough has ridges to mark each quarter inch but as you can tell, seeing them in pictures is difficult. Let's help the judges out and run the Sharpie down each ridge to mark the quarter inches and allow the judges to see a more accurate measurement. See how much clearer this is?!


Next we need to lay out the bungees where they are going to go and mark the spots we need to drill. You will have to drill on both sides (a total of six holes). On most of these troughs there is a double ridge that runs along each side. You only want to drill through the outer most ridge, not both. You hole size should be just enough to get the bungee through tightly. This smaller hole and single ridge will provide a friction point to keep the bungees in place.


After you drill the holes, thread the bungees through. It should look something like this. Your selection of hole placement is preference really but I am planning on catching some fish over 20 inches so I put the last bungee at 18 inches. 


Next you'll need to cut a piece of styrofoam or pool noodle to float the board. I used styrofoam and chose to wrap it in tape so it wouldn't shed all over my kayak. This is less necessary with a pool noodle. 


It is pretty easy at this point. Slide your float between the bungees and trough and voila! You can vary the thickness on the float but I wanted it to float and sit up off of my lap a bit. 


Hopefully this will help a few folks avoid some of the foibles of kayak tourney fishing that I committed last week. This rig should float, keep fish attached to the board better and keep those judges from having to guess at your lengths. 

If you like the idea, please share it with others. Thanks Bryan Row. This will be a huge help next time for me!


Rookie Mistakes in a Kayak Fishing Tourney

Yesterday was a first for me. I fished my first official kayak bass fishing tournament with the North Texas Kayak Bass Fishing Club. I had a great time with these guys over the weekend and would do it again in a heart beat. And while these guys are great, this is not a piece on promoting the NTKBF tourneys (though I need to do that). This is a piece to confess mistakes, make some lists and hopefully pass on some knowledge to future tournament kayak anglers.

ACK Hawg Trough
Ruler Board/Hawg Trough
Most kayak tournaments use the Catch-Photograph-Release (CPR) technique to determine a winner. If you buy a hawg trough from one of the many retailers like Austin Canoe and Kayak, they come marked every inch. They do have ridges so you can measure up to 1/4 of an inch but they are the same color as the board. You quickly find out at "weigh-in" that those 1/4" lines are very important and very hard to see in a picture. Take a sharpie and run over those ridges and the judges will never have to guess. But to even get a picture, you have to keep the fish on the board. This is a dexterity challenge while floating in a kayak with a paddle, a fish with hooks in him trying desperately to stab you with the hooks, a trough and camera, not to mention the required identifier that has to be in the picture. A friend, Bryan Row, had a great idea and attached three small bungees to the board so he can strap the floppy slime rockets to the board for a picture. It was ingenious and I had to pass it along. It must work because Bryan placed second this week!

Confidence Baits and Techniques
Hag's F4 Tornado
You know them and use them. They are your go to baits and styles. These are usually the first thing you go to when a new method or bait is failing after the first 10 casts that you tried it. Mine is a drop shot rig with a F4 Hag's Tornado. I can catch fish out of a dry sewer line with this setup and yet I didn't fish it on tournament day until an hour before weigh in. Why? I over thought the lake. I had never fished Purtis Creek before except for pre-fishing the evening preceding the tournament. In that time I tried what people told me would work, different locations, depths I normally didn't fish and it hurt. At 12:30 I had two fish out of five and I caught those in the first 30 minutes of the day. When push came to shove, I switched back to my confidence setup and was rewarded with the three fish I needed to round out my limit. They were not huge by any stretch of the imagination but five fish on tourney day is never a given. The lesson here? Don't deviate. After talking to the winner, rodmaker Walker Nelson, my thoughts were reaffirmed. He said he stuck to his game plan and didn't deviate. Congrats on a great win Walker! 

Planning and Homework
I spent the better part of the last two weeks planning for this event. I scoured what topographical maps I could find and used overlays from satellite maps to determine the most likely places I could catch fish. I prefished the day before and did okay but felt lack luster about it. At dinner that evening I got some tips on where some fish were. After a slow morning I abandoned my plan and spent the next three hours chasing someone else's plan. That did nothing for me. In the time I left my prep work and techniques at the door, not a single fish came into the boat. Not a single, solitary fish. When I abandoned other plans and went back to my own, I caught the rest of my fish for the day. Lesson learned. If you doubt this, go back up a paragraph and read Walker's comments. 

Always Be Prepared
You just never know. It will creep up on you when you least expect it so pack accordingly. Not all of these things happened to me but some unexpected events at the tournament this weekend produced a bit of hilarity, some panic, some disgust and even some hunger. 

Raccoons will steal your food. All of it. 

Branches barely sticking out of the water get caught in scupper holes. Have a plan. And a saw.

The sun doesn't rise until well after 6AM this time of year. Have what you need to be legal on the water.And a light to see the dangers.

You can get sunburned even when it's raining.

Cameras fail. Have a backup plan.

The weather is like a good woman, usually beautiful and complex but she'll lose control every now and again and you should be ready for how you'll handle it. 
------------------------------------------------------------------------------------------------------------


Until next time, keep your food in the car and stick to the game plan.


September Events Continued

More events happening in Texas for kayaking instruction, tourneys and demo days from Sept 18-30.

September 22:


Rise Adventures End of Summer Bash VIII
Where: Meadowmere Park, Lake Grapevine
When: 9A-3P
What: Allowing people with physical disabilities the chance to get out on the water in a kayak. There will also  be swimming, golf, archery, pony rides a petting zoo and more!
Cost: FREE for persons with disabilities and their families
Contact: 469-762-5075


Austin Canoe and Kayak Demo Day
Where: Texas Ski Ranch (New Braunfels)
When: 9A-5P rain or shine
What: Over 80 models of kayaks with up to 30% savings on select items
Cost: FREE
Contact: 512-396-2386 or 888-828-3828


Austin Canoe and Kayak Demo Day
Where: Independence Park (Missouri City)
When: 9A-5P rain or shine
What: Over 80 models of kayaks with up to 30% savings on select items
Cost: FREE
Contact: 713-660-7000 or 888-828-3828


September 23:


Where: San Marcos Store
When: 10A-5P
What: Lots of New Product, Savings and Lunch Provided
Cost: FREE
Contact: 512-396-2386 or 888-828-3828

Austin Canoe and Kayak Expo
Where: Houston Store
When: 10A-5P
What: Lots of New Product, Savings and Lunch Provided
Cost: FREE
Contact: 713-660-7000 or 888-828-3828


September 28:


Fundraising Tourney for Heroes on the Water
Where: Meadowmere Park, Lake Grapevine
When: 6P-9P
What: Benefit Bass and Catfish Tourney with 50% going to HOW
Cost: $5 for Big Bass and Big Cat


September 29:


North Texas Get Together (Texas Fishing Forum)
Where: Twin Coves Park, Lake Grapevine
When: 8A-?
What: Lots of good times with kayaks, fun, games and a donation box for HOW
Cost: $5 gate entry fee
Contact: http://texasfishingforum.com/forums/ubbthreads.php/topics/7863319/1/Official_North_Texas_GTG_Threa


Kayaking Events This Weekend into Next Week

Sometimes it is hard for folks to get connected to other kayakers. It's not like the lakes most of us are on are full of them. It's even harder to meet folks on a secluded river. Keeping that in mind, I wanted to let everyone know about some upcoming events in Texas that will allow for folks to fish together, meet new people, test out new boats and everything else kayak related. Without further ado, here you go:

September 15th:


Austin Canoe and Kayak Demo Day
Where: Hyde Park Quarry, Austin
When: 9A-5P rain or shine
What: Over 90 models of kayaks with up to 30% savings on select items
Cost: FREE
Contact: 512-719-4386 or 888-828-3828

Kayak Instruction, Inc Demo Day
Where: Paddle Point Park, Lake Ray Hubbard
When: 9A-1P
What: Jackson Kayaks with Tips, Tricks and Lunch Provided
Cost: FREE
Contact: 214-629-4794


Kayak Angling Clinic by Dean Brown
Where: Demo Pond at Bass Pro Shops in Grapevine
When: 3PM
What: A kayak clinic covering some very specific tactics and tricks that Dean has developed over the past few years, as well as some of his photography techniques (pertaining specifically to the kayak).
Cost: FREE


September 16th:


Austin Canoe and Kayak Expo
Where: Austin Store
When: 10A-5P
What: Lots of New Product, Savings and Lunch Provided
Cost: FREE
Contact: 512-719-4386 or 888-828-3828

NTKBF Kayak Fishing Bass Tournament
Where: Purtis Creek State Park, Eustace
When: 5:30A-4PM
What: Bass Fishing Tournament for Kayak Fishermen
Cost: $10 + $4 for Park Admission

September 17th:


Mariner Sails Wind and Water Sports Scotty New Product Open House
Where: Mariner Sails Wind and Water Sports, 11110 N. Stemmons Freeway, Dallas, TX 75229
When: Monday, September 17th, from 6:00pm -- 8:30pm

What: An informative open house and to to acquaint (or refresh you) with the Scotty line of fishing accessories. Our special guest for the evening will be Ryan Emile, from British Columbia Canada, our International Sales Representative for Scotty. Ryan will be presenting new Scotty items, ideas, as well as many helpful tips and suggestions from Scotty's vast line of fine fishing and marine products. Included in his new presentaton will be several new and upcoming "YakAttack inspired Accessories" that were co-created by 
Luther Cifers, the amazing YakAttack genius.Cost: FREEContact: 972-241-1498


Come back tomorrow for more events happening next weekend!


Summer is Over and Deal Season is Here!

Labor Day marks the end of summer for most folks. It's back to school time for the kids. Businesses are starting a new fiscal year soon and the holidays are within sight. What Labor Day also marks is the beginning of sale season for kayaks.

Commonly thought of as a summer time hobby or sport, kayaking enjoys a bolus of participants between May and September. The crowds on local lakes start to thin more and more as the weather becomes more tolerable. Hunting season has started and for some that means dove hunting and then deer hunting. For me it's always DEAL hunting.

Kayaks, both used and new are at the end of their cycle for the year. Dealers are reducing inventory for the winter months, doing some trade-ins, selling off the rental fleet and clearancing out. They know the pattern. It's their business. Craigslist will be flooded with people needing to sell a kayak for this or that. There are nomadic, seasonal kayakers who often sell a boat just to make a lease payment for deer season. Then there is dad, who thought he could convince the family to kayak with him, who instead is needing to sell a tandem to get a solo kayak. It takes all kinds. Often it works out for both parties. Everybody gets what they want and the cycle continues into next year.

Over the last several years I have used fall and winter as a time to upgrade. Often, there are folks looking for a boat I have, rigged and ready to fish and are willing to pay a fair amount for it as is. I then turn that money into a better deal for me by finding great deals. I scour the dealer sites for clearanced or blemished kayaks daily. I look on Craigslist, Texaskayakfisherman.com and Texas Fishing Forum for deals. If you are patient, you can find a great deal.

It is important to note I paddle/fish year round so my investments don't rot away in the garage waiting for summer. My experience on the water tells me what I like, don't like and helps me create new ways to rig up for fishing. When I am looking, I narrow my field to a handful of kayaks. I do homework on widths, lengths, capacities, storage, known issues and the like to be able to wait for that one sweet deal and then pounce when it arrives.

I went to look just now and here are a few that I found:

Austin Canoe and Kayak has this one right now-

Wilderness Systems Commander 140 Kayak - 2012 Closeout >
Description: Save big on this 2012 closeout color. With even more storage space, leg room, capacity, and speed than the Commander 120, the Wilderness Systems Commander 140 hybrid sit-on-top/sit-inside is the ultimate hobby machine.
MSRP: $1149.00  Our Price: $849.00  
SAVE: 26.1%

With $49 residential shipping, that is a really good deal!


Mariner-Sails.com has this one:


Kayak - Native Watercraft Ultimate 14.5 Volt - Demo
 
Product #: 
LP ULT145VOLT_DEMO 
Retail Price: 
$2,199.00 
Online Price: 
$1,495.00


Craigslist has a Hobie Pro Angler listed for $2000 right now with lots of upgrades and extras. The ad reads:
2012 Hobie Pro Angler 14. Olive. Almost new condition. Comes with Hobie paddle, mirage drive with turbo fins, supernova kayak led lights and battery. 2000 .

Also a pretty good deal. 

There are several used kayaks on TKF and TFF for 50-70% of retail right now. 

As the weather cools, the deals will heat up. Be on the look out and you could get a great upgrade this winter too! 


If you have some deals you would like to include here please post them in the comments section. No charge at all, just post them up! You can also email me and I will post them for you or provide links.

Let's Talk About Seats!

Kayaks come in all shapes and sizes. So do their seats. Some have tall lawn chair style seats while others have a molded butt scoop. It really depends on the type pf kayak you have AND what you plan on doing with it.

There are four types of seats that you can find in your typical kayak. Of these only two are really seats to speak of but I'll let you decide.

Backrest
The Backrest-
This "seat" is actually no seat at all. It is made to give back support and usually connects to some pad eyes to rest your back on. These are fairly in expensive and pair well if you are going to sit in that molded butt scoop that a sit on top kayak has for you. It's almost as if they were saying, "Hey, Dummy! Sit here." The backrest serves it's purpose and can get you on the water for a longer amount of time as it can reduce fatigue in the back. These run anywhere from $25-$89 and fit almost every kayak. A sub category in the backrest section are those backrests for hard molded seats like the Wilderness kayaks. These serve a different purpose but because they are a smaller subset, I am going to move on. Here is a good selection from Austin Canoe and Kayak.


Bottom Pad
The Bottom Pad-
If you are going to be in heavy chop, rapids, beyond the breakers at the coast or paddling like you're on a bucking bronco rather than a sleek boat, this might be a good choice. Filled with varying materials, this seat will give your posterior added cushioning to avoid bruising and saddle sores. Another added benefit is that it elevates you slightly off the deck so if you don't have scupper holes in the seat well you reduce the occurrence of a wet backside. These come in varying thickness and can be very helpful as well as easy to store. Prices start at $12 and go up but chances are you can find a good one for less than $40. Make sure you check out the varying thickness, method of attachment and get good measurements. You want to make sure it will fit.
Wanna check these out? Go here.

The Lawn Chair-
This is a newer style of seat and it only works with certain kayaks like Diablo, Jackson and a few others. The kayaks sometimes come with one of these if it is made for it but in case you need a new one, bought a used model without it or need to add as an upgrade (as in the Diablo models), these are available. The lawn chair style chair (more than a seat) has great back support, comfy bottom support and allows for a higher vantage point when fishing. If you really want to check one of these out look here. If you want to learn more about Diablo kayaks then you should check them out here.
Jackson kayaks can be found here.

The Full Seat-
Skwoosh Voyager
The combination of a back rest and bottom pad all in one nice, neat package makes up a full seat. They come in regular and high back styles and vary as much as your imagination can dream. Some of these seats have rod holders attached. Some have tackle boxes. The things to look for here are dimensions of the bottom pad (to make sure it will fit) and four attach points. Some seats only have two attach points and will side back and forth which causes less support. Bottoms of these seats vary in thickness and padding as well. One of the seats I paddle with is a Skwoosh Voyager seat. it has added gel padding in the bottom pad and is a high backed seat with some storage on the back. This seat has four attach points and does well in most applications.
The other seat I have is a Surf to Summit seat for angry water situations. It has a foam reinforced bottom pad that is two inches thick and is high backed
as well. Full seats are by far the most versatile of the group but that comes at
a price. Full seats range from $20 up to over $200.


Regardless of what you choose, always remember to try before you buy!


I Bought a Fishing Kayak. Now What?

It's a great feeling to pull the trigger on a new fishing kayak (or any kayak for that matter). Especially that first one. Your very first kayak is special. It's almost like when my oldest child was born. There was a ton of anticipation, excitement and several months leading up to it. When it finally arrived I was so excited but at the same time scared. Now what? Hopefully you bought it at a place like Austin Canoe and Kayak, Colorado Kayak Supply or other reputable dealer and they can help with this next part. If you didn't buy your kayak from a dealer, didn't have someone to guide you through and are spinning from all the options, keep reading.

As with kids, the kayak makes you start to think of "What else do I need?" Maybe your budget is tight and you can't get everything all at once. That is most of us. Don't be embarrassed. Very few of us have everything we need as soon as we get home. I've been through this process several times and it is different with every one but what I would like to offer is a shopping list. Start at the top and work your way down. Some people may have differing opinions and that's great. What I am hoping to do is take some of the guess work out of gearing up and save you the headaches I have gone through. This list is specific for kayak fishermen so after the second item the list would vary for other sports.

Start Here:


Stohlquist PFD
PFD (Life Jacket)- Most people go straight for the paddle. The only reason I recommend a PFD first is safety. If you blow all of your money on a fancy paddle and end up paddling in an $8 PFD that fits like an albatross, you won't be paddling for long. Choose a good PFD and always wear it. Check out the Astral Buoyancy and Stohlquist PFDs. Want to learn more about PFDs? Click Here. I also recommend a knife and a whistle to attach to the PFD so you can call for help or cut your way out of a tangle or hung anchor. If you are going to paddle at night, get a 360 degree light.

Paddle- This is your motor. Use this paddle guide and find the right one for you. If you only have two things you can buy, they need to be a good PFD and a paddle. That seems like a no-brainer but lots of people skimp on the first and sell their kayak shortly after from non-use.

Anchor Trolley- It seems strange to buy this before an anchor but believe me when I say you will be much happier if you do. An anchor trolley allows you to use a drift sock, stake out stick and anchor while positioning yourself to take advantage of the wind, not be a victim of it. This also will allow for a quick release if you get into trouble. This is the one I use. Inexpensive and easy to install.

Bruce-Style Claw Anchor
Anchor- This is the most widely mispurchased item under $50. Anchors exist in all shapes and sizes. The most popular one is the collapsible anchor. This is also the most frequent one laying at the bottom of a rock pile or root group in 20 feet of water. Use a bruce-style claw anchor and use the zip tie method of connection to get your anchor back from the murky depths. Here is a link from TexasKayakFisherman.com that shows the proper way to rig this up.

Anchor Rope (and accessories)- Most anchors don't come with rope. If you are going to be fishing in any current or wind at all most people will recommend 2X the length of rope for the depth you are fishing. So if your fish are in 20 feet of water, you need at least 40 feet of rope. If you are fishing on the coast it is recommended 3X the depth. I like 3/16" rope but choose what you like. Just don't buy 1/16" rope and expect to raise a big anchor easily. While you are there in the rope section, pick up a carabiner and rope float to attach to these as well.

Rod Holders- These come in different varieties. You can get flush mount, rocket launchers, trolling rod holders for baitcasters and spinning, rail mount, and the list goes on and on. Look at some rigging pictures, sit in your boat, see where you can reach and then go buy one.

Milk Crate- You can buy one or ask a retail grocer for one. Either way, you can strap this down to the back of most kayaks and hold tons of tackle and gear. You can also add some PVC to be additional rod holders. Cheapest investment you'll love forever.

Everything Else-These things will get you going pretty well. After you have the above mentioned items, you should look at, in no particular order: a fish finder, stabilizers (depending on the kayak), drift sock, stake out stick, VHF handheld radio, scupper plugs (for sit on tops), waders, paddle gloves, really the list goes on and on. Most of all, have fun and catch some fish!


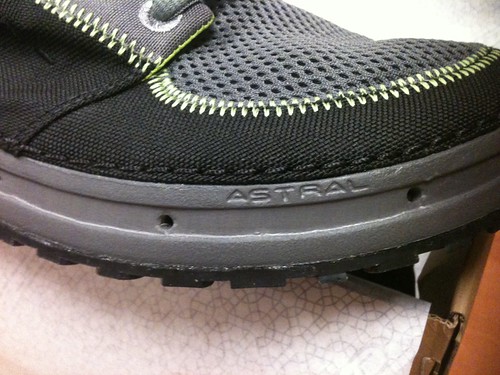
The Astral Brewer Final Verdict

I did an initial thoughts review earlier in the month on Astral Buoyancy's new shoe (and first venture into the market), the Brewer. If you are interested in those initial thoughts in full, click here.


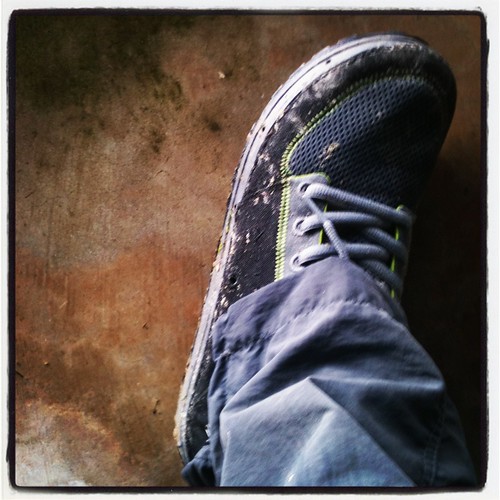
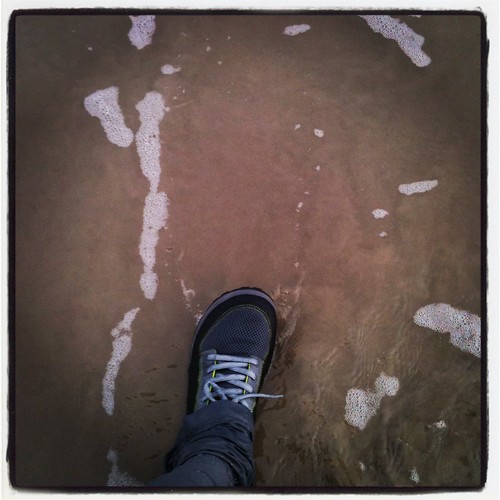
This is my review after four days of harsh conditions, surf fishing, beach pounding and tons of use.

Astral Brewer
The Brewer is a tough shoe. It is designed for outdoorsmen by outdoorsmen. Having been in the salt, rapids, wakes, water, streams and puddles the better part of three decades, I feel like I have significant enough time in to make a valid claim: These shoes rock!

They are not without fault but we will cover that in a bit. First, I need to tell you what they have been through. I have sloshed through calf deep mud, waded through roaring breakers, trekked across marshlands and been to the grocery and bait store many times over the last week.
These shoes took it all in stride. Not only that but a quick rinse in the outdoor shower and they were back to looking great in an instant.

The laces are thick and stayed tied through almost everything. I rarely had to retie. At one point we went down to a jagged rock ledge to fish and I had to climb around on anything but flat rocks with wet shoes on. Thankfully, they were the Brewers. The Stealth rubber sole gets very tactile when wet and I had zero slippage issues. The fold down heel served its purpose well when I needed to run down stairs to go get something from the car. Just slip them on and off you go.

The drains worked very well. I could take them off soaked and in a few minutes they would be dry. This may not always be the case in every locale but in Texas, that's a huge benefit. The outer shell of the shoe is rugged. It actually deflected a rogue hook at one point and saved me from another cut. The sole is thick enough that punctures are not a constant worry as with other shoes. The stitching held up through the constant sand burrs and shoe no signs of wear or raveling.

The interior sole fit my foot like a glove. The alternating pattern on the interior gave good stability and the shoe cradles your foot like a memory foam mattress. By day four my feet had settled in and made a home with support in the right places. I was a little worried since I have high arches but had zero issues wearing these all day.

The Tongue
One of my favorite aspects of this shoe though is the tongue. I didn't talk about it much earlier but it actually stayed in place. I don't remember a single time of having to fish that tongue out from the side of the shoe. In four foot swells, that is a small miracle.

As for the not so great, let's chat. Astral, if you are listening, please change this soon.

The shoes caused a blister the first day out. Where the outside of the upper joins the toebox on the inside of the shoe is a seam. It catches my feet right on the little toe on the knuckle. It did this on both feet. I have to say I was mad. I dropped $100 on shoes that tore up my feet. I was heartbroken too. I visited with a couple of other people about shoes and most were having this issue. Still. I was not happy. I wanted these to work so badly. Maybe it is my feet. Maybe people normally don't have this issue. I looked inside and the seam is coarse. Both shoes, left and right. I made a quick trip to the store and bought some low cut nylon/poly blend quick dry socks and tried them with the shoes. Problem averted. I continued on the rest of the week this way and had zero issues. Just be aware, if your feet have a different pronation than most or you have a high arch as I do, this could be an issue. You can solve it fairly easy but I was miffed at first.

So they $1,000,000 question: Would I buy another pair? In a heartbeat.

 I'd buy them faster than that if they fix the seam issue.

If you want a pair talk to Colorado Kayak Supply. Super fast shipping, great selection and excellent customer service. Buy them here.


Sand+Water=Good Times
Brewers on the beach
Beach Brewer- Still looking good after
four days of punishment

Technology on the Water

Nearly 128 million Americans have smart phones now according to Pew and Nielsen. That is approximately 50% of the US population. Of those numbers, you have a lot of kids under the age of 10 so the %ile goes even higher. I am going to go out on a limb and say if you are reading this blog, you probably either have one or know someone very close to you with one. That's a pretty sturdy limb. 

So now the question is not do you have one but rather, are you utilizing its full potential? 

Traditionally cell phones and water sports don't mix but as a paddler/fishermen you may be missing out on some things that could give you: an advantage at tournament time, cut homework in half for fishing prep, make sure you don't get a fine for launching in the wrong place and  tons of other information and add-ons that will make you a mobile intelligence station. 

The first thing you need is phone protection. Options are going to vary depending on the phone you have. The things you need are a case that is as water tight as possible and possibly a dry bag for it. Here are my recommendations based on trial, error, frying a phone, and feedback from other paddle/fish friends.

iPhone 3GS or 3 and HTC EVO Android Phones- 
OtterBox Defender
The OtterBox Defender, $40. I have used this case for quite a while. It doesn't claim to be waterproof but with three layers does a good job of making it tough for water to get to the phone. Couple this case with a Dry-Lock bag and you are good to go. Through the three layers you can still use the phone's touch screen and not worry about moisture on your hands. It's a really good case for the money and the rubber backing will hold it in place on a dash board, console or wherever. These come in multiple colors so go wild! Just remember, it doesn't float.


LifeProof case
iPhone 4, 4S-
LifeProof case, $80. This is a case I have seen in action multiple times. This one is water proof, shock proof, dirt proof, toddler proof (I added that), and a variety of other things. With this case you don't need a Dry-Lock bag at all. Keep it in your pocket, your jacket, whatever and it will keep on ticking. If I had an iPhone 4S (come on October!), I would put it in this case. "But wait (he says in an infomercial voice), there's more!"
Also available from LifeProof is a LifeJacket for your LifeProof case. Drop it in the water and yes, your phone and the $600 you've invested in it floats at the top of the water awaiting your rescue. Finally! How long have we needed this!


Now that your phone is protected, we need to talk about how it can be of more use than just the boss calling. 
Myriad apps exist that are supposed to make fishing, paddling and the like easier but in actuality, most of them are junk. I have waded through several that were so cumbersome that I wanted to throw my phone in the lake. I am going to help you out and give you the best of the best that I have used. These are not the only apps that work but for a paddle/fisherman, this is what I recommend. 


Solunar TablesSolunar Calendar by Solve the Puzzle A/S 

This app syncs the solunar tables into your calendar based on your location and can set reminders. It will tell you when to fish or when to just paddle. It's designed for iPhone and works with older and newer iOS. For 99 cents it's handy to never have to find a copy of Field & Stream at a gas station. I saw one rating in July that said "Outstanding", usually it would be "Excellent". I had never seen that description before and the fishing was on that day. 
This tool is nice to have because it gives corresponding moon and sun times and works for the coast or the lake. 


Navigation- Marine&Lakes: US&Canada By Navionics 
This app has saved me several times. From boat lanes to topo maps, it has everything I could ever need. At $15, some people balk at the price but to get this chip for a handheld or fishfinder it's $100. I figure I am getting an 85% discount and who doesn't love that? If you need to mark those spots where you are slaying fish or mark a route through that mangrove forest, this is your app. Waypoints are limited only by storage and if you have that many waypoints you need to share. With me. Not only do you get regional coverage but anywhere you draw a box around in the US and Canada, it will download all the info. Super sweet for the budget conscious.


Launch PointsACK Kayak Launch Points 2.0 Pro by Austin Canoe & Kayak
The gang at Austin Canoe and Kayak have just upped your expectations. With an interactive store, kayak launch spots across the US and a social feature you can get all your supplies and info right here. At only 99 cents, the Pro is the way to go. You can search for points based on distance, most liked and set up favorites. While you are at it, submit a launch point or just search the map. If you need a break you can read the ACK newsletter, lookup how to's or just watch a video. This app is amazing and I am sad I just found it last week.


TidesTide Graph By Brainware
Want to know when the tide is moving? Checkout Tide Graph. I've been using this app for about 18 months and it is very accurate. You can select different points along coast lines and know exactly when the fish are going to be moving. For $2 you won't have to trust that printed card for accuracy. You can pinpoint where you are going to be and know exactly what's going to be moving and the rate. If you are fishing in salt even once a year, this will be the best $2 you spend. If you couple this with the solunar table, you'll find some hungry fish. This isn't just innovation, it's information at your hands when you need it. 


As I implied earlier, this is not the end all be all list but it has definitely improved my fishing over the time I have had a smart phone with these apps. Learn to read them and the water is your oyster. Open it up and see what you find. Additional apps you find helpful are more than welcome in the comments section and are encouraged. 


Picking a Paddling PFD


As I teased over the weekend, I wanted to do a PFD (Personal Flotation Device) or life jacket selection guide this week. Before I can dive into which ones are best and give you a link or two to find them, it's important you know the differences in style and type.

In PFDs there are three basic styles.

#1- Inflatables- These are lightweight and do not float you until you hit the water, at which point it inflates and floats you to the top. These are easy to wear but also easy to forget so be aware. It is also important to test them and if it has been inflated once, you have to go buy a new cartridge so it will work next time.

#2- Permanently Buoyant- These are the typical life jackets that are worn. They can be a bit bulky and usually get stowed because of it. A stowed PFD rarely saves a life when compared to one that is worn.

#3- Hybrids- These are a mix of the two types and offer some flotation with being inflated.

The US Coat Guard classifies PFDs into five different types.

Type I- This is a PFD that will float a person right side up in the water. It is typically used in ocean vessels or places where rescue will be a long way off.

Type II- This is similar to a Type I. It doesn't have the same flotation power however and may not right you in the water. These are for offshore uses where rescue may be a bit faster and you can see land.

Type III- This is your typical recreation life jacket. It will float you but won't right you and this should only be used in lakes, not open water, and rescue should be at hand.

Type IV- Remember the life preservers from the Love Boat? Ok, maybe not. Remember the big ring at the lifeguard stand? That's a Type IV. Anything you can throw that will help someone float that isn't worn typically falls under this category.

Type V- These are specialized PFDs for activities like kayaking, skiing, and other water sports.

One last thing before we get to the selections:
Remember that in Texas:

  • Children under 13 years of age in or on vessels under 26 feet must wear a U.S. Coast Guard approved wearable PFD while underway.
  • All vessels under 16 feet (including canoes and kayaks) must be equipped with one Type I, II, III or V for each person on board.
  • Vessels 16 feet and longer, in addition to the Type I, II, III or V for each person on board, must have one Type IV throwable device which must be readily accessible. Canoes and kayaks over 16 feet are exempt from the Type IV requirement.

Ok, so I am assuming that if you are here you are a paddler, boater or family member/friend. Moving on that assumption there are two types of life jackets that work best for paddling, Type V and Type III. In these, there are several choices to make.In the styles, I want permanence. This is strictly a preference but I don't like inflatables. 
Call me old fashioned but if I am going down the Devils River, far away from rescue, fall out of my kayak, my PFD inflates and then get it punctured by a rock, limb, fishing hook etc, I am then in very bad shape. I don't want multiple life jackets for different scenarios. I want one. One that will do everything I need. I paddle in a PFD that will always float me and not fail me because a mechanism went out. Or a cartridge. There is plenty to think about as safety goes without worrying about maintenance on a PFD. So here are my recommendations:

Stohlquist
If you are fishing from your kayak, I like the 
It offers good arm clearance, shoulder webbing, good cinching to avoid ride up, the back cushioning is high enough to avoid that backrest on your seat and has multiple tethers and pockets to keep everything close at hand. You can get this jacket from youth size all the way up to a 54" Men's so almost everyone can enjoy utility and comfort at the same time. It even has a net ring on the back collar so you can dip up that prize catch without fumbling for the net. 
This is a Type III PFD.

If you are wanting to just paddle and be more recreational, I like the 
Astral Buoyancy V-Eight Life Jacket - PFD.
Astral
With a mesh back, a releasable inside clasp to cool off but stay buckled, adjustable shoulders that continue to the back and mesh pockets that lay flat when not in use, the Astral is a great choice. With less bulk than most recreational PFDs, the V-Eight will help you stay cool in the hot summer months while staying safe at the same time.
This is a Type III PFD. 


You don't have to buy these to be safe but if functionality and safety are a must at all times for you, these two will give you good bang for the buck, last a long time and become part of your paddling equipment that is a "Don't leave home without it". 


Turtle Now to Save Your Life

The idea of falling out of a kayak is the exact reason why people either:
#1 Don't/Won't buy a kayak
#2 Buy a particularly wide kayak

This is nothing new. People don't buy any floating vessel only to end up bobbing beside it shortly after launch but maybe they should try it.

Later this week we will talk about PFD (life jacket) selection and that will play a role here but for now I want to talk about the first thing you should do on your first trip out with a new to you kayak.

Turtle! Jump out! Flip the thing and get wet! Don't just do it because it's 129 degrees right now (though that helps). Every kayak paddler should know how to get back IN/ON the kayak. When you Paddle/Fish like I do, it becomes even more important. Let me tell you my first experience with turtling and why it's so important you practice re-entry.

I have been paddling and fishing since 2003. In that time I have owned multiple kayaks of the sit in and sit on variety. During that time I had never fallen out/off my yak. After reading several stories of drownings, near drownings and bad events due to turtling during all times of the year, I decided for me and my family, we needed to practice. We practice all types of drills at work and that is to be prepared for the worst. The same can be transferred to the water. Practice so when the time comes, you don't panic and end up, well....dead.

In late spring I purchased two new sit on top Cobras, a single seat Navigator and a Tandem. These are the only boats in our fleet now and get a lot of usage. The first time out I told my wife and kids we had to know how to get back on. I told them I would go first so they could see how to do it and then they would try. I walked the kayak out to waist deep water with my PFD on and jumped on to the Cobra. No problems. This was more of a test for me before I went out to where I couldn't touch. It gave me some confidence and I paddled out to 10 feet of water. I counted to three and rolled off the side. Oh, crap! Something was wrapped around my leg. As I tugged on it panic started to creep in. Breathing was becoming more labored and I needed to let the PFD do its work. I relaxed and floated upright. I could feel the cable or cord growing tighter as the kayak drifted further away. Of course! The paddle leash. I grabbed the leash further up toward the connection to the yak and pulled hard. The boat floated toward me and gave me some slack around my leg. I loosened its grip from my leg and let go. I was free! So was the Cobra though and I had to swim for it. I kicked and thrashed my way along side and latched on. I rested for a minute, exhausted, and planned my attack. I would try to propel myself out of the water and grab the opposite side of the boat (perpendicularly), then hoist myself onto it and voila. What I didn't calculate was how tired I was and how heavy I was. I managed to get out of the water enough to grab the other side but promptly pulled it over on my head. This is not good. I pushed the boat off of me and righted it. Attempt two I didn't even grab the other side. People on the shore, including my family, are starting to wonder about this display I was putting on. I held on to the kayak for another five minutes and then gave it everything I had and finally, I got on top! I was out of breath, panting and glad to be aboard. And let's be clear, I'm no couch potato. I can still paddle 10 miles a day and at 6'2" am still under 200 lbs. Worn out. That stupid paddle leash got me.

Over the next few days I kept replaying that scenario in my mind, thankful I had done it. I had been arrogant about not turtling. I figured it would never happen to me. That all went away that afternoon. I was humbled by a paddle leash. Thank God that the water was warm and I had my PFD on. If it had been on one of my January outings when the water registers somewhere between 38 and 40 degrees, even with my PFD I could have died. The chill of water that cold takes your breath. You hyperventilate and usually end up gulping in water. You can drown while you are floating. If that doesn't get you the hypothermia will. The only way to survive the water in the winter is to get out of it as soon as possible.

You need to know how to get back in your kayak whether it's warm or cold. Things can go wrong. People die. If all you had to know to survive was how to get back in, wouldn't you do it? That is why I implore you to turtle now! Learn while it's warm. Wear a PFD. Turtle. Reboard. Practice.

If you want to try turtling before you buy a kayak you should test one out at a Kayak Demo Day like the one Austin Canoe and Kayak is having September 15th and 22nd. Just don't forget to wear a PFD.


For a video check out the link below. This isn't mine but is very helpful.Credit to Ken Whiting of Kayak Fishing Tales.


It's Hot Outside, Do I Really Need That Lifejacket?

I can't tell you how many times I hear the question, "It's really hot! Do I HAVE to wear my lifejacket?"
This is usually followed up by a bold declaration of "I'm a good swimmer."

I hate that. I know people can swim but what can you do in a state of shock, tangled in a trotline, in really rough water or with no one around? Unfortunately in 2007, 107 people didn't get to answer that question. They perished during canoeing and kayaking outings according to the US Coast Guard. The USCG has also stated that 90% of these people were not wearing a PFD. What if 96 people could go home at the end of the day instead of their next of kin getting the worst news of their lives? Wouldn't it be worth it?

It won't happen to me.

Those are the last words spoken by many victims. They are also spoken by "tough guys" everywhere. Please, you are not immune to drowning. Your family wants to see you again. Don't risk it.

So what's the solution Mr. Paddle/Fish?
I'll give you two recommendations.

#1- Wear it. It can't save you from the truck or from the storage in the hull. Just wear it.
#2- Choose a versatile PFD.

I do not recommend buying a PFD sight unseen. I am NOT saying don't buy one online. Great deals can be found at places like Austin Canoe and Kayak, Colorado Kayak Supply and Astral Buoyancy. There are all different fits, styles, prices and types. Later this week I'll introduce you to more specifics and make some paddling type recommendations but for now, go to a local shop and try them on. Grab one of the paddles and practice that motion while wearing the PFD. Does it rub? Does it ride up. Now sit down. Where does the padding hit? Become familiar with types, brands and more and then focus in on one or two. DO some internet research and find the best deal. Make sure that when you buy one it has a 30 day return policy just in case but most importantly, WEAR IT! Everytime. All day. In Texas the weather is over 100 degrees almost all summer but I am wearing that PFD all day every day. If it's too hot for you to wear it, don't go. You are a lot safer on your couch than on the water without a PFD.